
Welcome to another installment of my series, “Getting My House In Order.”
I am slowly working my way through the different spaces in our home that have been overflowing with clutter. Even just starting this journey in the past month has felt life-changing—I’ve been able to significantly decrease my stress and mental load, decrease the time I spend cleaning and organizing, and downsize our stuff.
Today we’re tackling the junk drawer!
Our junk drawer is in our kitchen—while junk drawers typically reside in the kitchen, they can also be commonly found in the entrance or mudroom of a home.
Even the term, “junk drawer,” perfectly describes how clutter just seems to attract itself to this space and “magically” appear out of nowhere. This is the home for items without a home, which is why it’s also a headache to declutter and organize.
Anytime you remove an item from the junk drawer, you need to use mental energy to rehome it in the proper place. Most junk drawers are often stuffed to the brim—that’s a lot of mental energy needed to declutter such a small space!
How To Declutter Your Junk Drawer
Empty The Entire Drawer
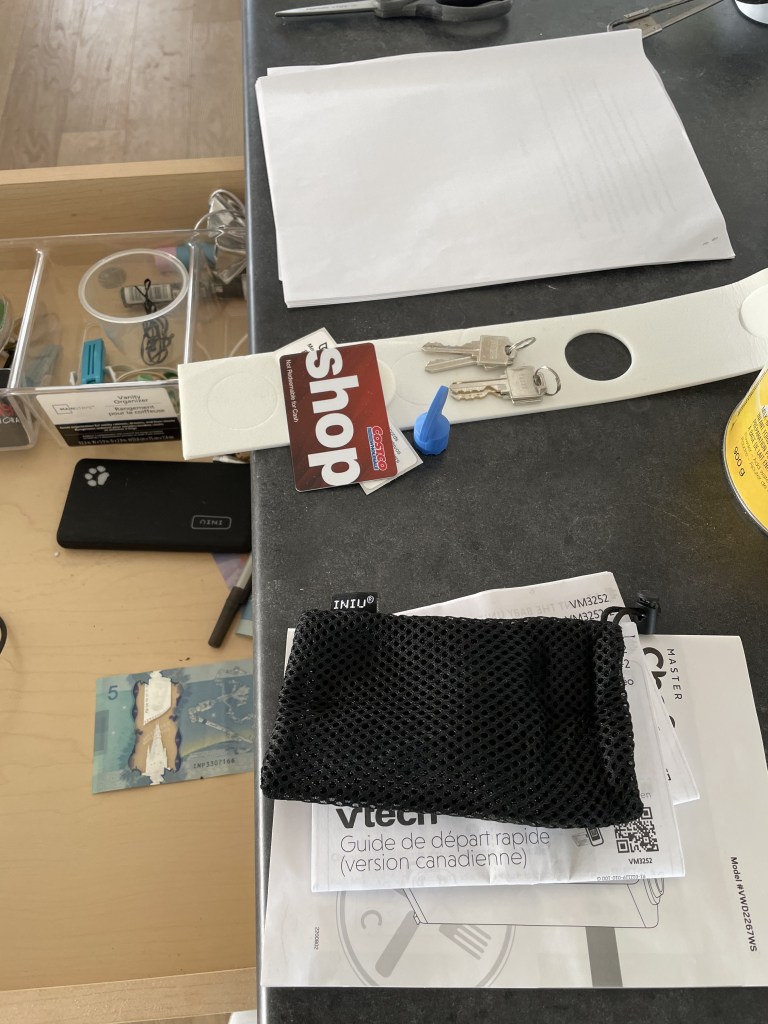
The first step is possibly the most obvious—let’s empty out the drawer! As you’re pulling out items, place them into general categories on your countertop (i.e., writing utensils, cords and electronics, papers, etc.).
If you find anything that can be thrown away, do so immediately!
Create another pile of items that already have a designated home in your house and just need to be returned to that place.
Return Items to Their Original Home
Remember that pile we just made of items that need to be rehomed?
Let’s tackle that next.
Doing this step immediately after emptying out the junk drawer will significantly decrease the number of items visible, therefore helping decrease your mental load when it’s time to do some decision-making while decluttering.
It’s also too easy to procrastinate returning items or to run out of time when working on a decluttering project, so at least this way, you’ll have made progress and can ensure there’s less of a mess.
Create Purpose
Come back to the junk drawer and evaluate its purpose—what purpose is this space serving in your life and daily rhythms? Ask yourself the following questions to get started:
- What items do I need readily available?
- Do I like to have pens and paper on hand for writing lists and notes?
- Do I like to have cords, chargers, or flashlights on hand?
- What routines and rhythms does this drawer support?
- Which items would I look for first in this drawer?
Once you’ve determined the function this drawer serves, go through the piles you’ve created in step one and only pull out the items that you need for this space to work well.
For example, when I determined the purpose of our junk drawer, it was for the following things:
- Have items ready for writing lists and notes
- Keep flashlights, a charging cord, and an external charger readily available
- Keep tape, and a pair of scissors available for random activities
- Keep the plastic letters for our felt coffee menu board
Note: Writing this section actually helped me further clarify our junk drawer’s purpose and made me realize I still had items I could further pare down or rehome.
Deal With The Piles
Now it’s time to tackle the rest of those piles.
Since everything that’s left now officially doesn’t belong in your junk drawer, you have 3 options:
- Declutter that item
- Rehome it
- Throw it away
Work your way through the piles and make those decisions now! Whatever you decide, don’t make more piles! Either throw the item right into a box bound for the donation center, immediately rehome it, or throw it in the trash. This will ensure you actually make progress and don’t end up with more mess.
Be Vigilant
Like I said earlier, it’s all too easy to procrastinate and toss items into a junk drawer instead of properly dealing with them in the moment.
You’re going to have to be vigilant to protect the beauty and order of your newly decluttered junk drawer. Here are a few methods you can use to maintain this space:
- Nothing new goes in the drawer – keep it simple and don’t let any clutter even enter the drawer!
- Once a week, go through the drawer and quickly evaluate if anything has managed to sneak in. Going through and decluttering, rehoming, and throwing items away should take only 5 minutes or less if you do it frequently enough.
Here’s the before and after of cleaning out our junk drawer:


Note: Since these photos have been taken, I’ve actually decided I wanted to remove the coloring book and bag clips/elastics from this drawer. I’ve also added scotch tape to the drawer.

So where did you put your bag clips & elastics?
Very clear instructions … nice work!
LikeLike
Thank you! I ended up putting the bag clips and elastics in our drawer that also holds parchment paper, ziploc bags, and beeswax wraps – that workflow seemed to make more sense for our routines!
LikeLike
I can really appreciate you focusing on something smaller, like a drawer. I find myself setting big goals that overwhelm me. We’re going through a decluttering phase and have a dumpster rental out front to help us, but if I can do little things like this all the time, I can likely avoid having to do weekends of decluttering all at once like we’re doing now. Thanks for sharing, it’s a great reminder!
LikeLike
I totally agree! It’s so exciting to tackle large decluttering and organizing projects, but it’s often the smaller projects and progress that help us keep up our motivation!
LikeLike